


On this tutorial we are going to show you ways anyone can construct their very own open-source ChatGPT without ever writing a single line of code! We’ll use the LLaMA 2 base model, positive tune it for chat with an open-source instruction dataset after which deploy the model to a chat app you possibly can share with your pals. All by just clicking our solution to greatness. 😀
Why is that this vital? Well, machine learning, especially LLMs (Large Language Models), has witnessed an unprecedented surge in popularity, becoming a critical tool in our personal and business lives. Yet, for many outside the specialized area of interest of ML engineering, the intricacies of coaching and deploying these models appears beyond reach. If the anticipated way forward for machine learning is to be one stuffed with ubiquitous personalized models, then there’s an impending challenge ahead: How can we empower those with non-technical backgrounds to harness this technology independently?
At Hugging Face, we’ve been quietly working to pave the best way for this inclusive future. Our suite of tools, including services like Spaces, AutoTrain, and Inference Endpoints, are designed to make the world of machine learning accessible to everyone.
To showcase just how accessible this democratized future is, this tutorial will show you use Spaces, AutoTrain and ChatUI to construct the chat app. All in only three easy steps, sans a single line of code. For context I’m also not an ML engineer, but a member of the Hugging Face GTM team. If I can do that you then can too! Let’s dive in!
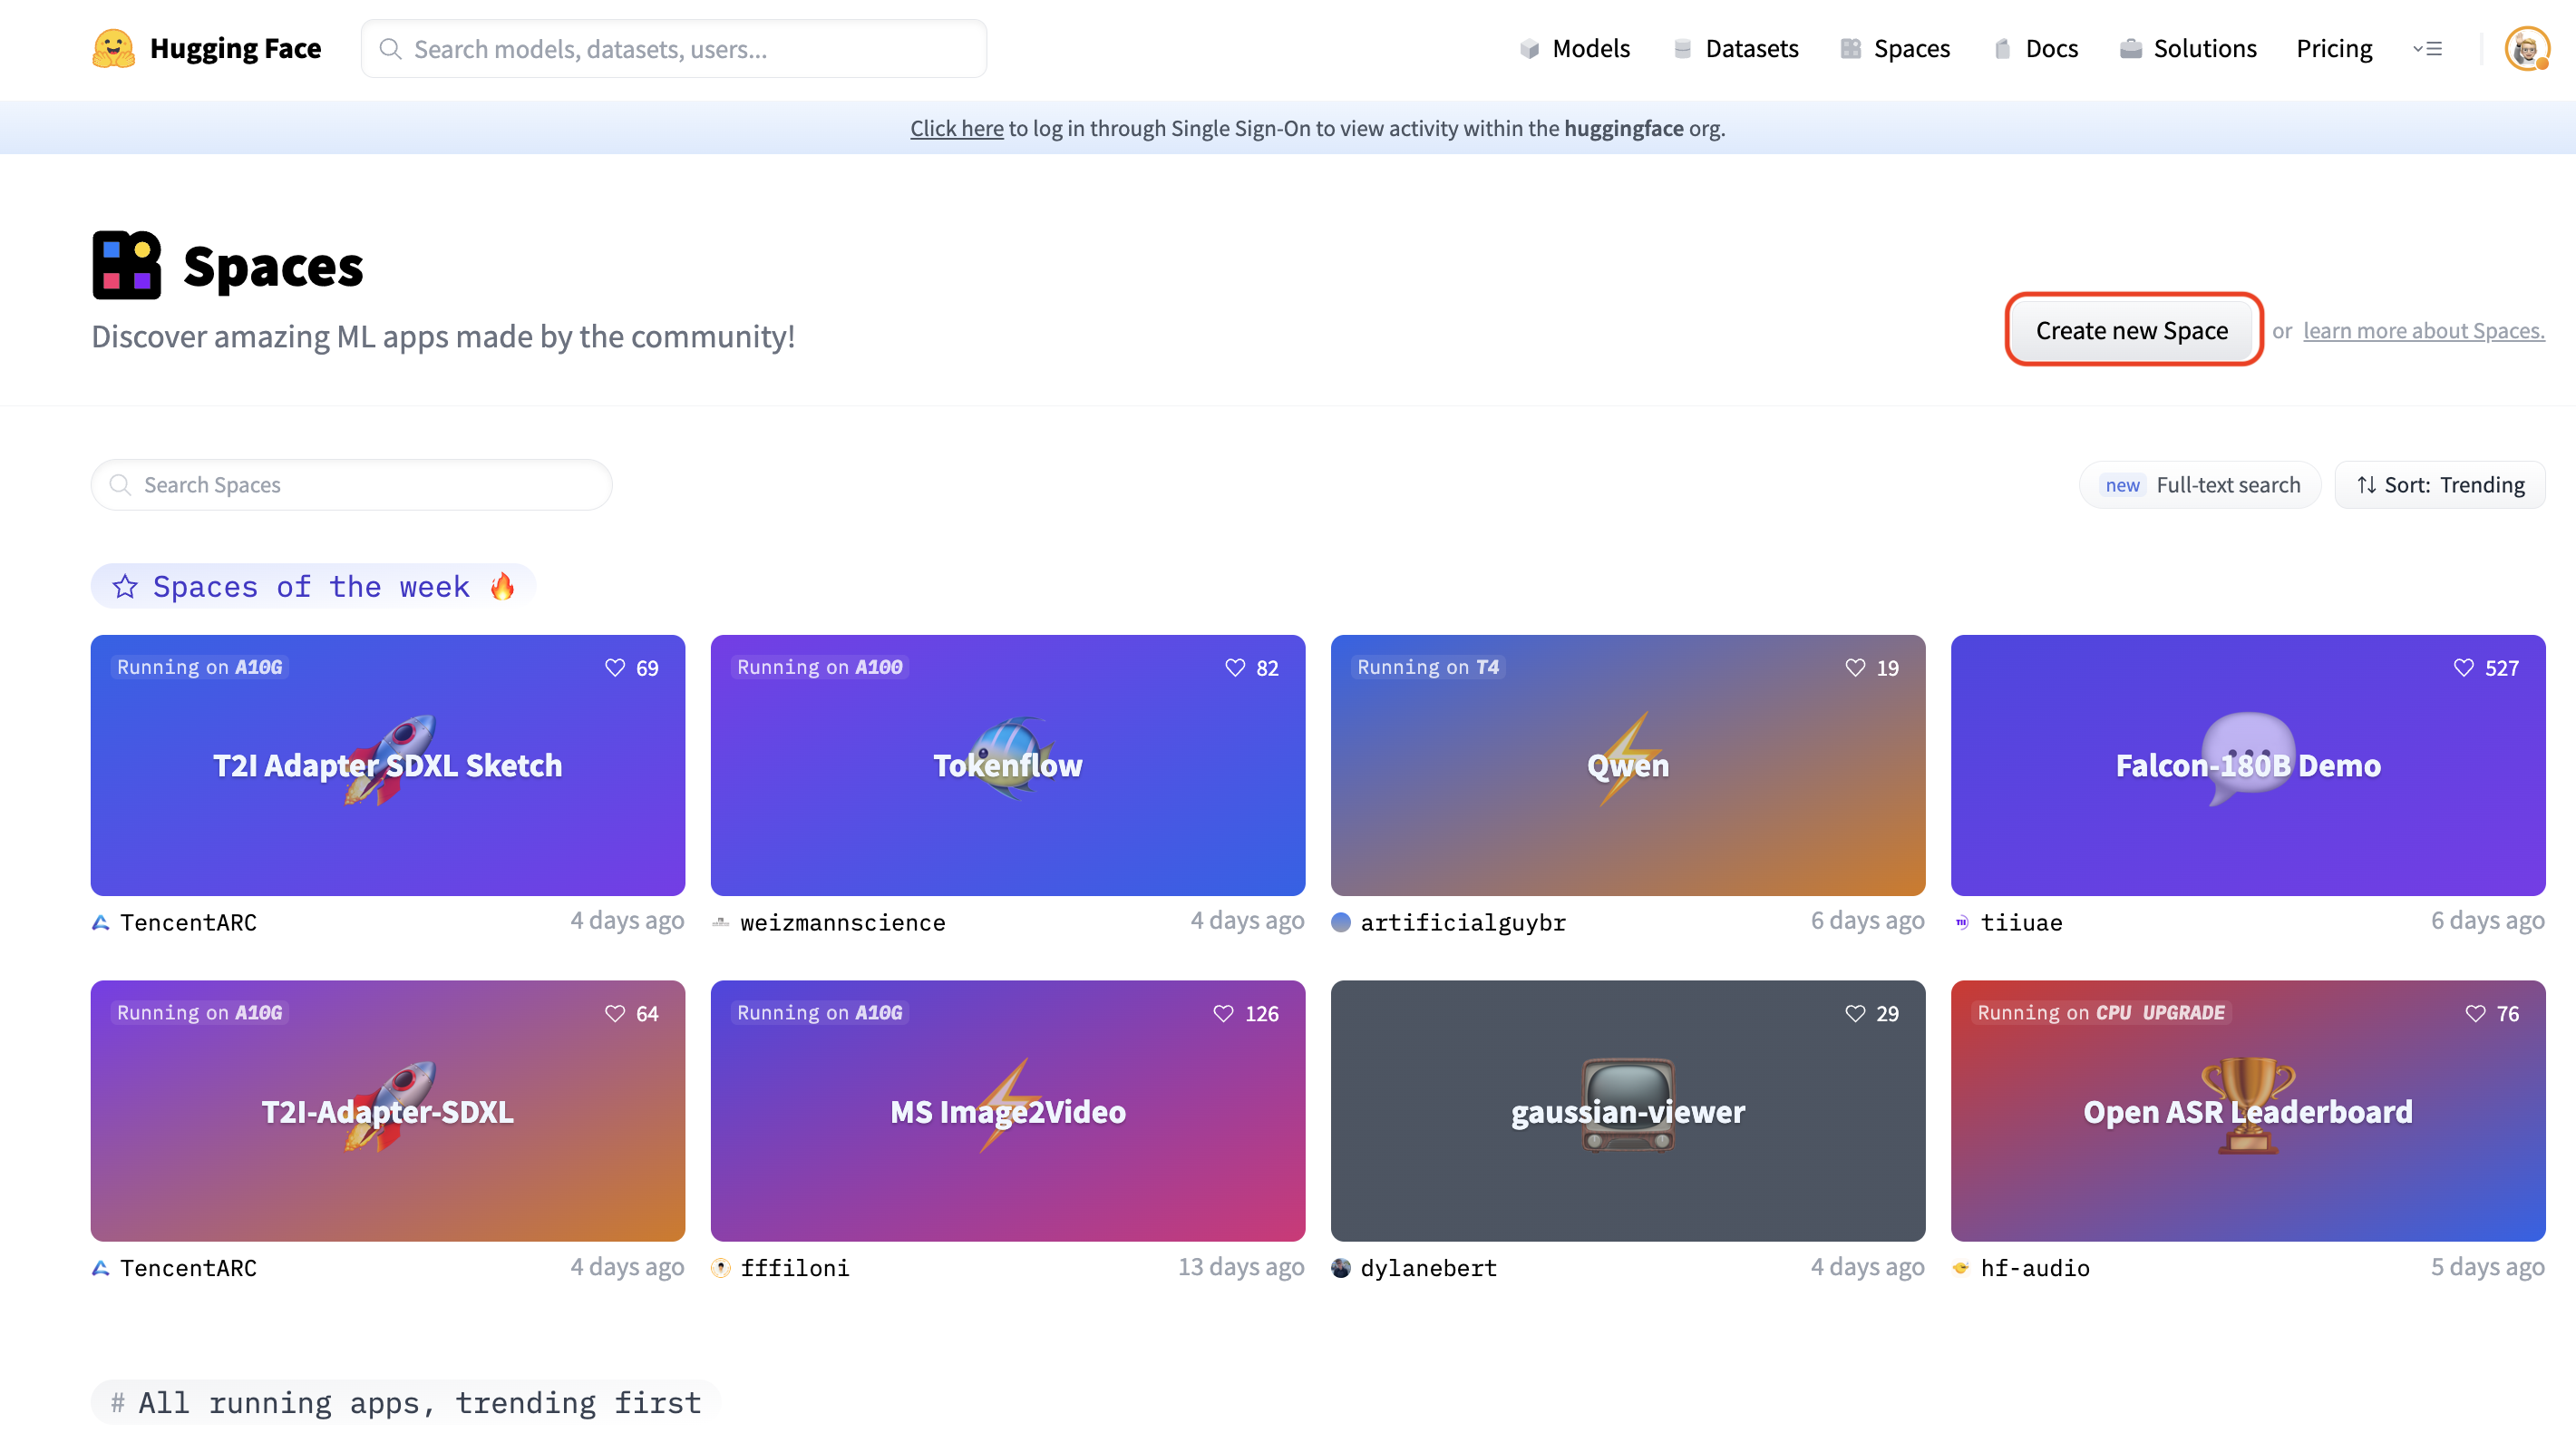
Introduction to Spaces
Spaces from Hugging Face is a service that gives easy to make use of GUI for constructing and deploying web hosted ML demos and apps. The service permits you to quickly construct ML demos using Gradio or Streamlit front ends, upload your personal apps in a docker container, and even select a lot of pre-configured ML applications to deploy immediately.
We’ll be deploying two of the pre-configured docker application templates from Spaces, AutoTrain and ChatUI.
You’ll be able to read more about Spaces here.
Introduction to AutoTrain
AutoTrain is a no-code tool that lets non-ML Engineers, (and even non-developers 😮) train state-of-the-art ML models without the necessity to code. It will probably be used for NLP, computer vision, speech, tabular data and even now for fine-tuning LLMs like we’ll be doing today.
You’ll be able to read more about AutoTrain here.
Introduction to ChatUI
ChatUI is precisely what it seems like, it’s the open-source UI built by Hugging Face that gives an interface to interact with open-source LLMs. Notably, it’s the identical UI behind HuggingChat, our 100% open-source alternative to ChatGPT.
You’ll be able to read more about ChatUI here.
Step 1: Create a brand new AutoTrain Space
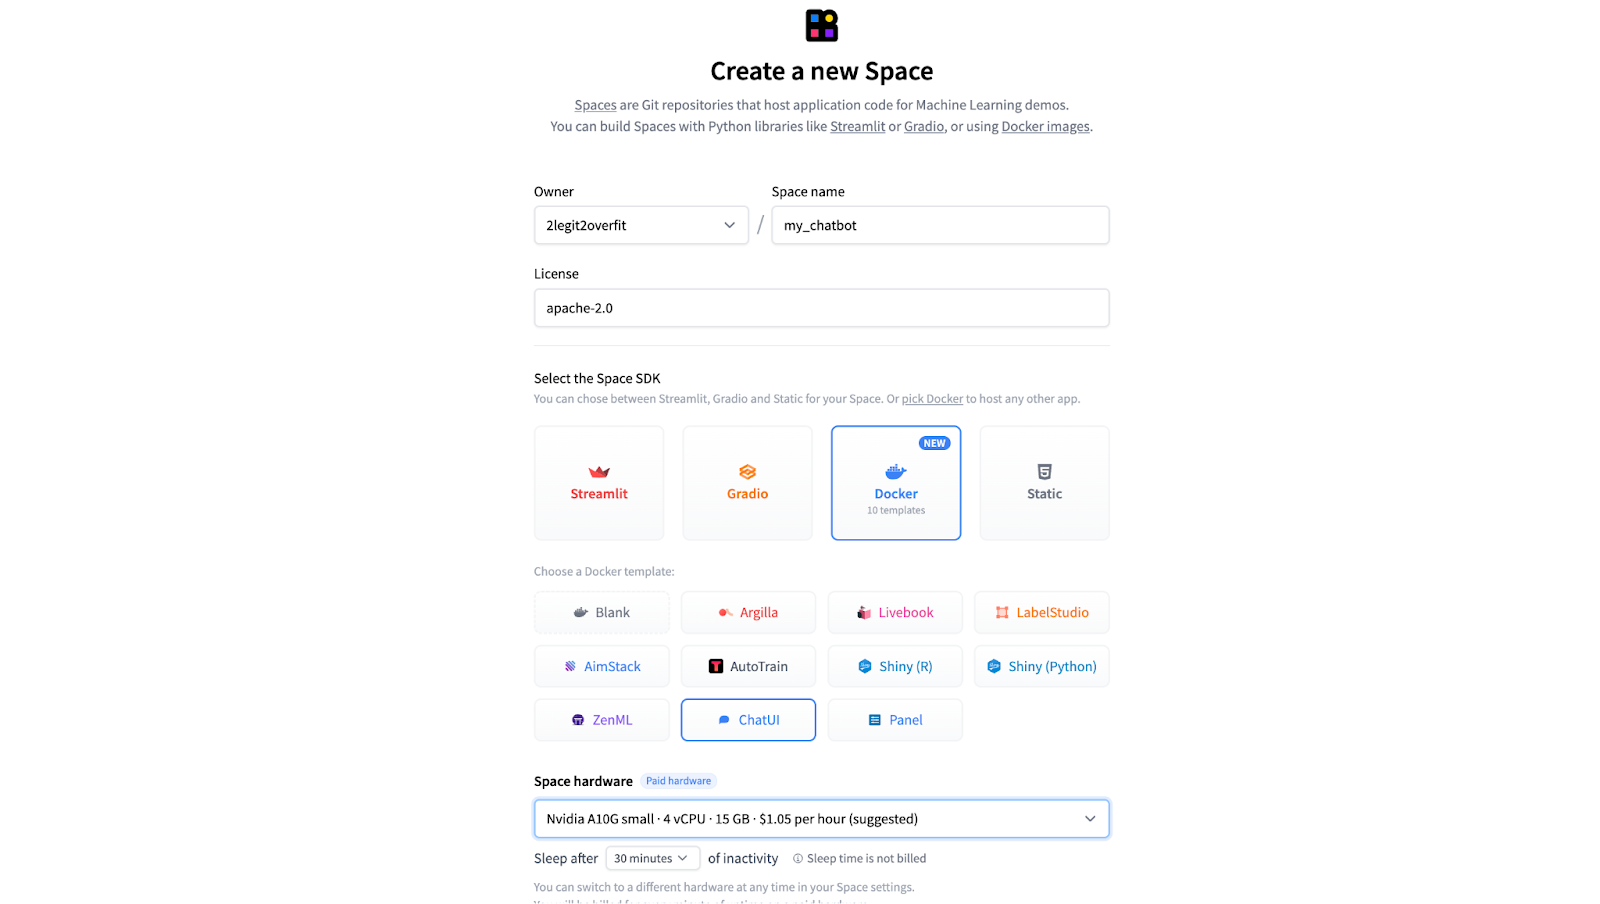
1.1 Go to huggingface.co/spaces and choose “Create latest Space”.
1.2 Give your Space a reputation and choose a preferred usage license in case you plan to make your model or Space public.
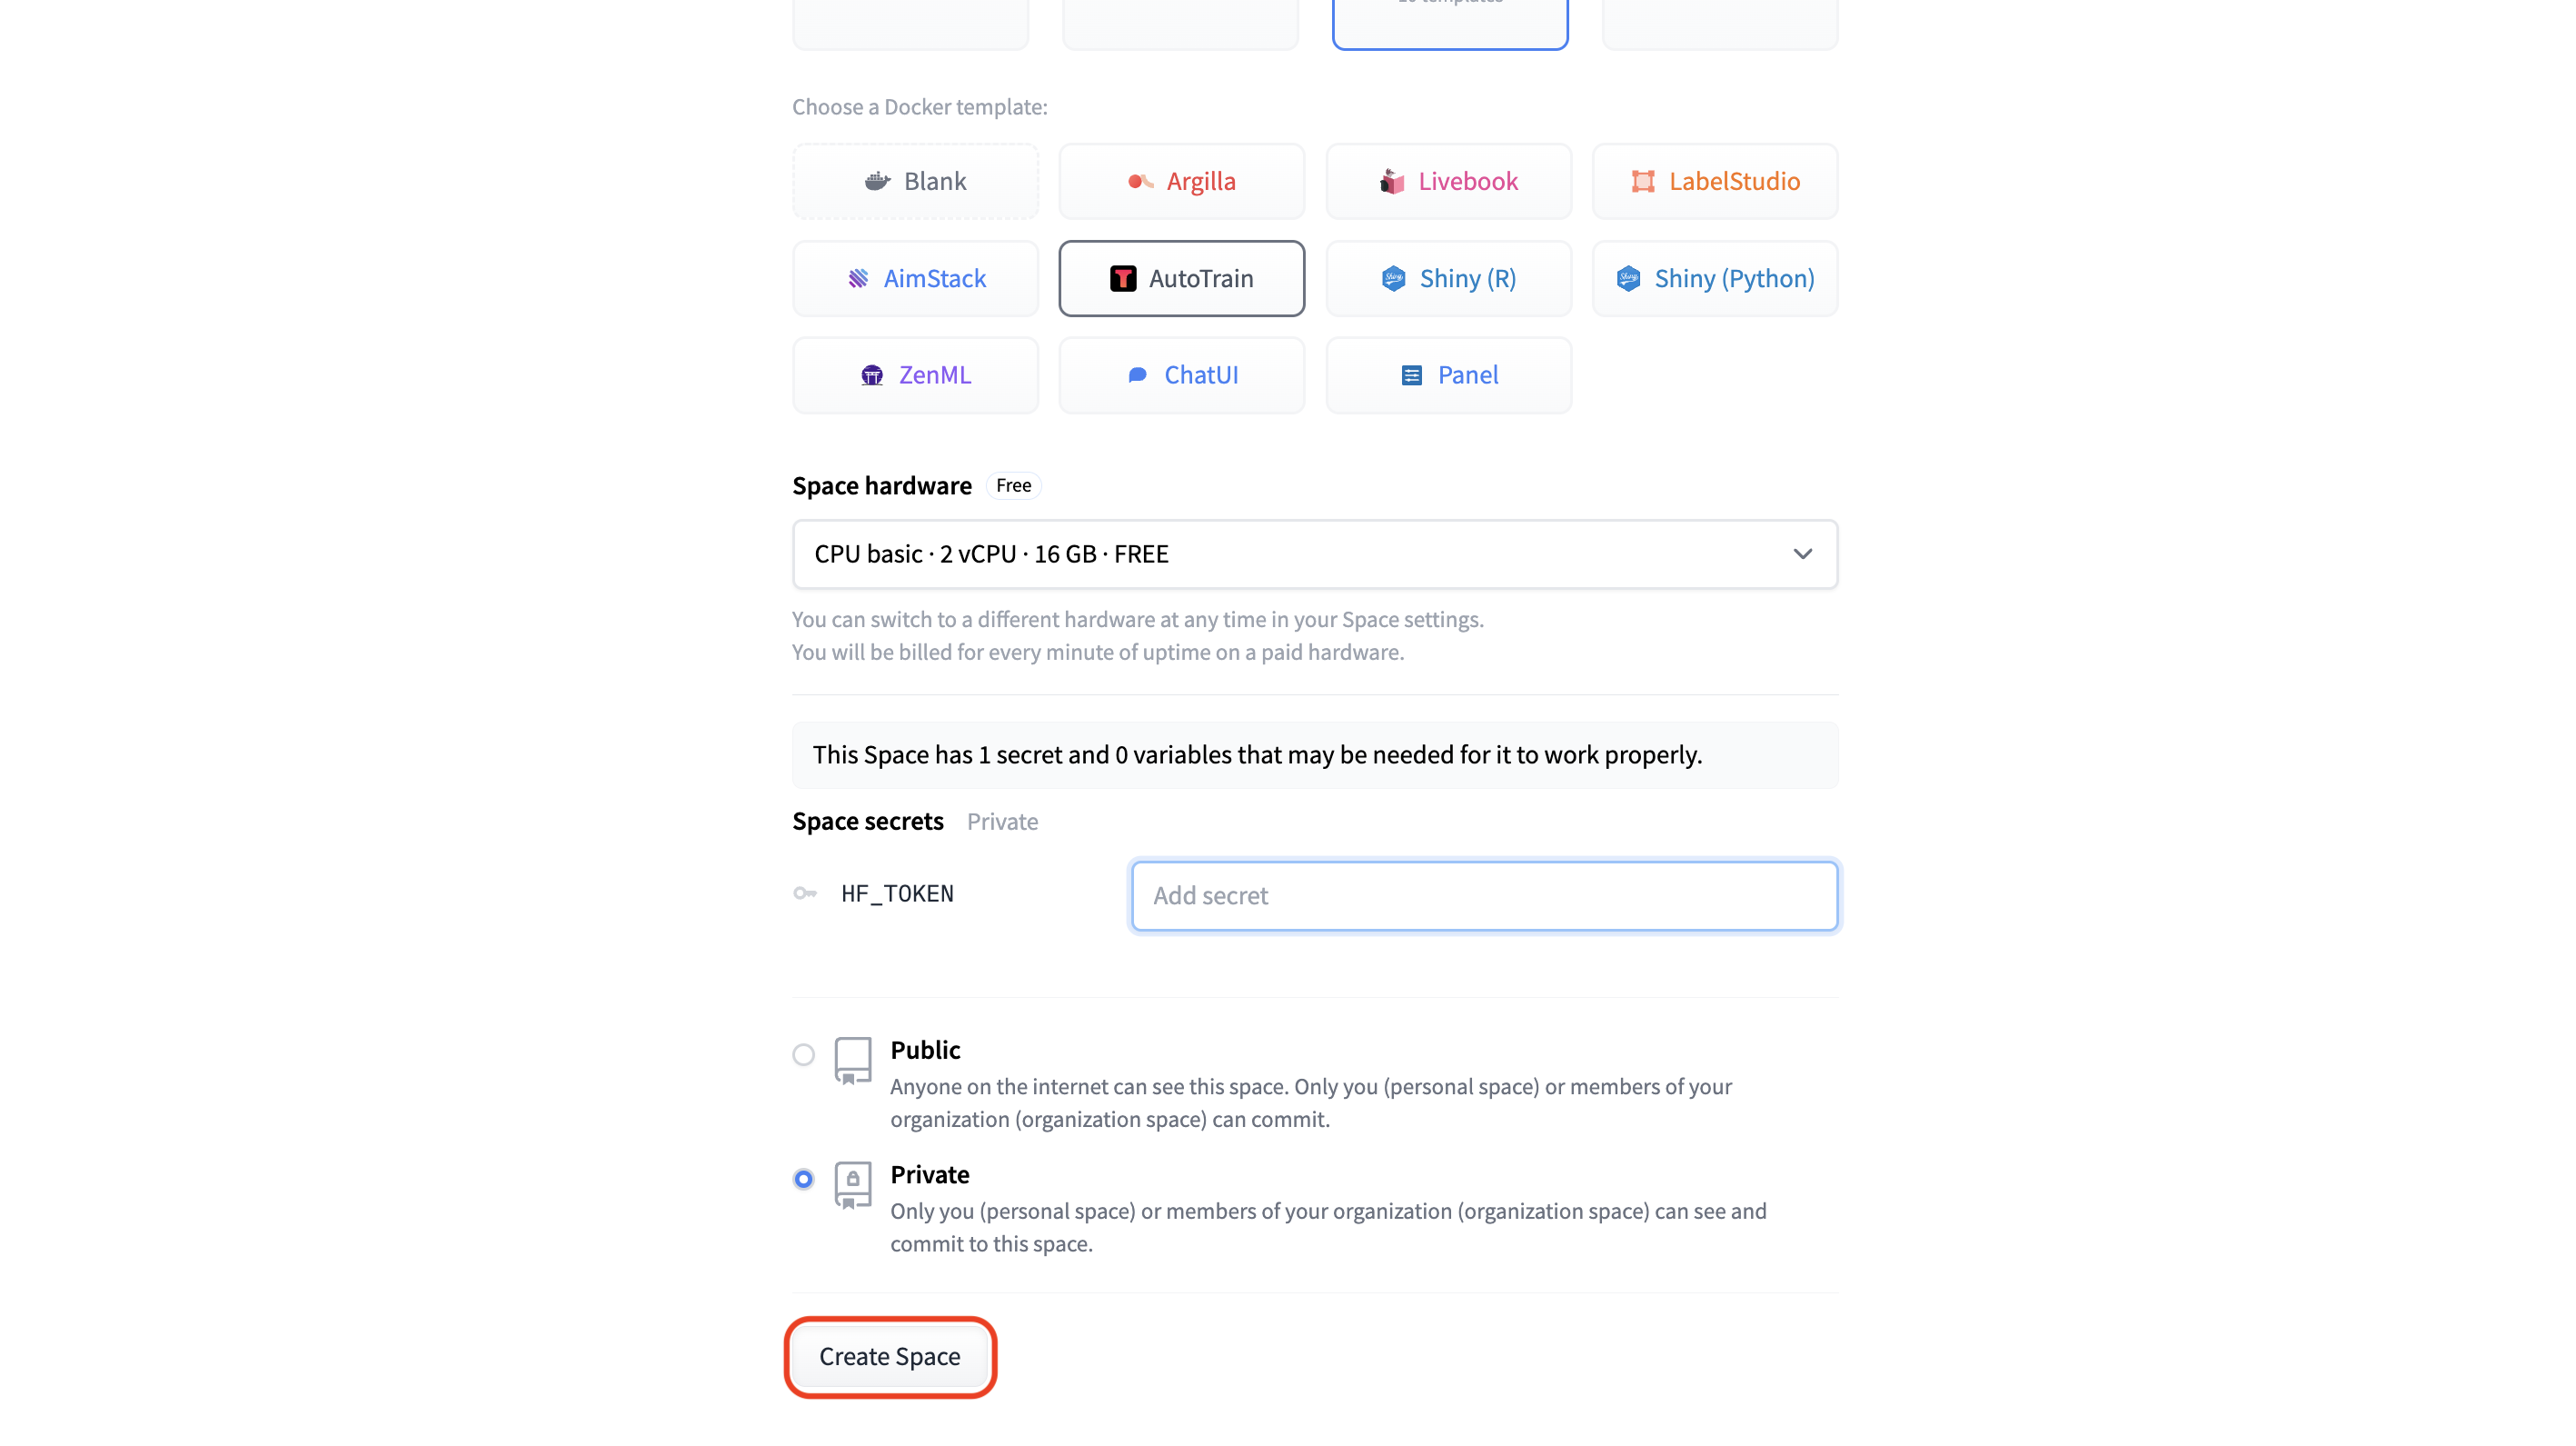
1.3 To be able to deploy the AutoTrain app from the Docker Template in your deployed space select Docker > AutoTrain.
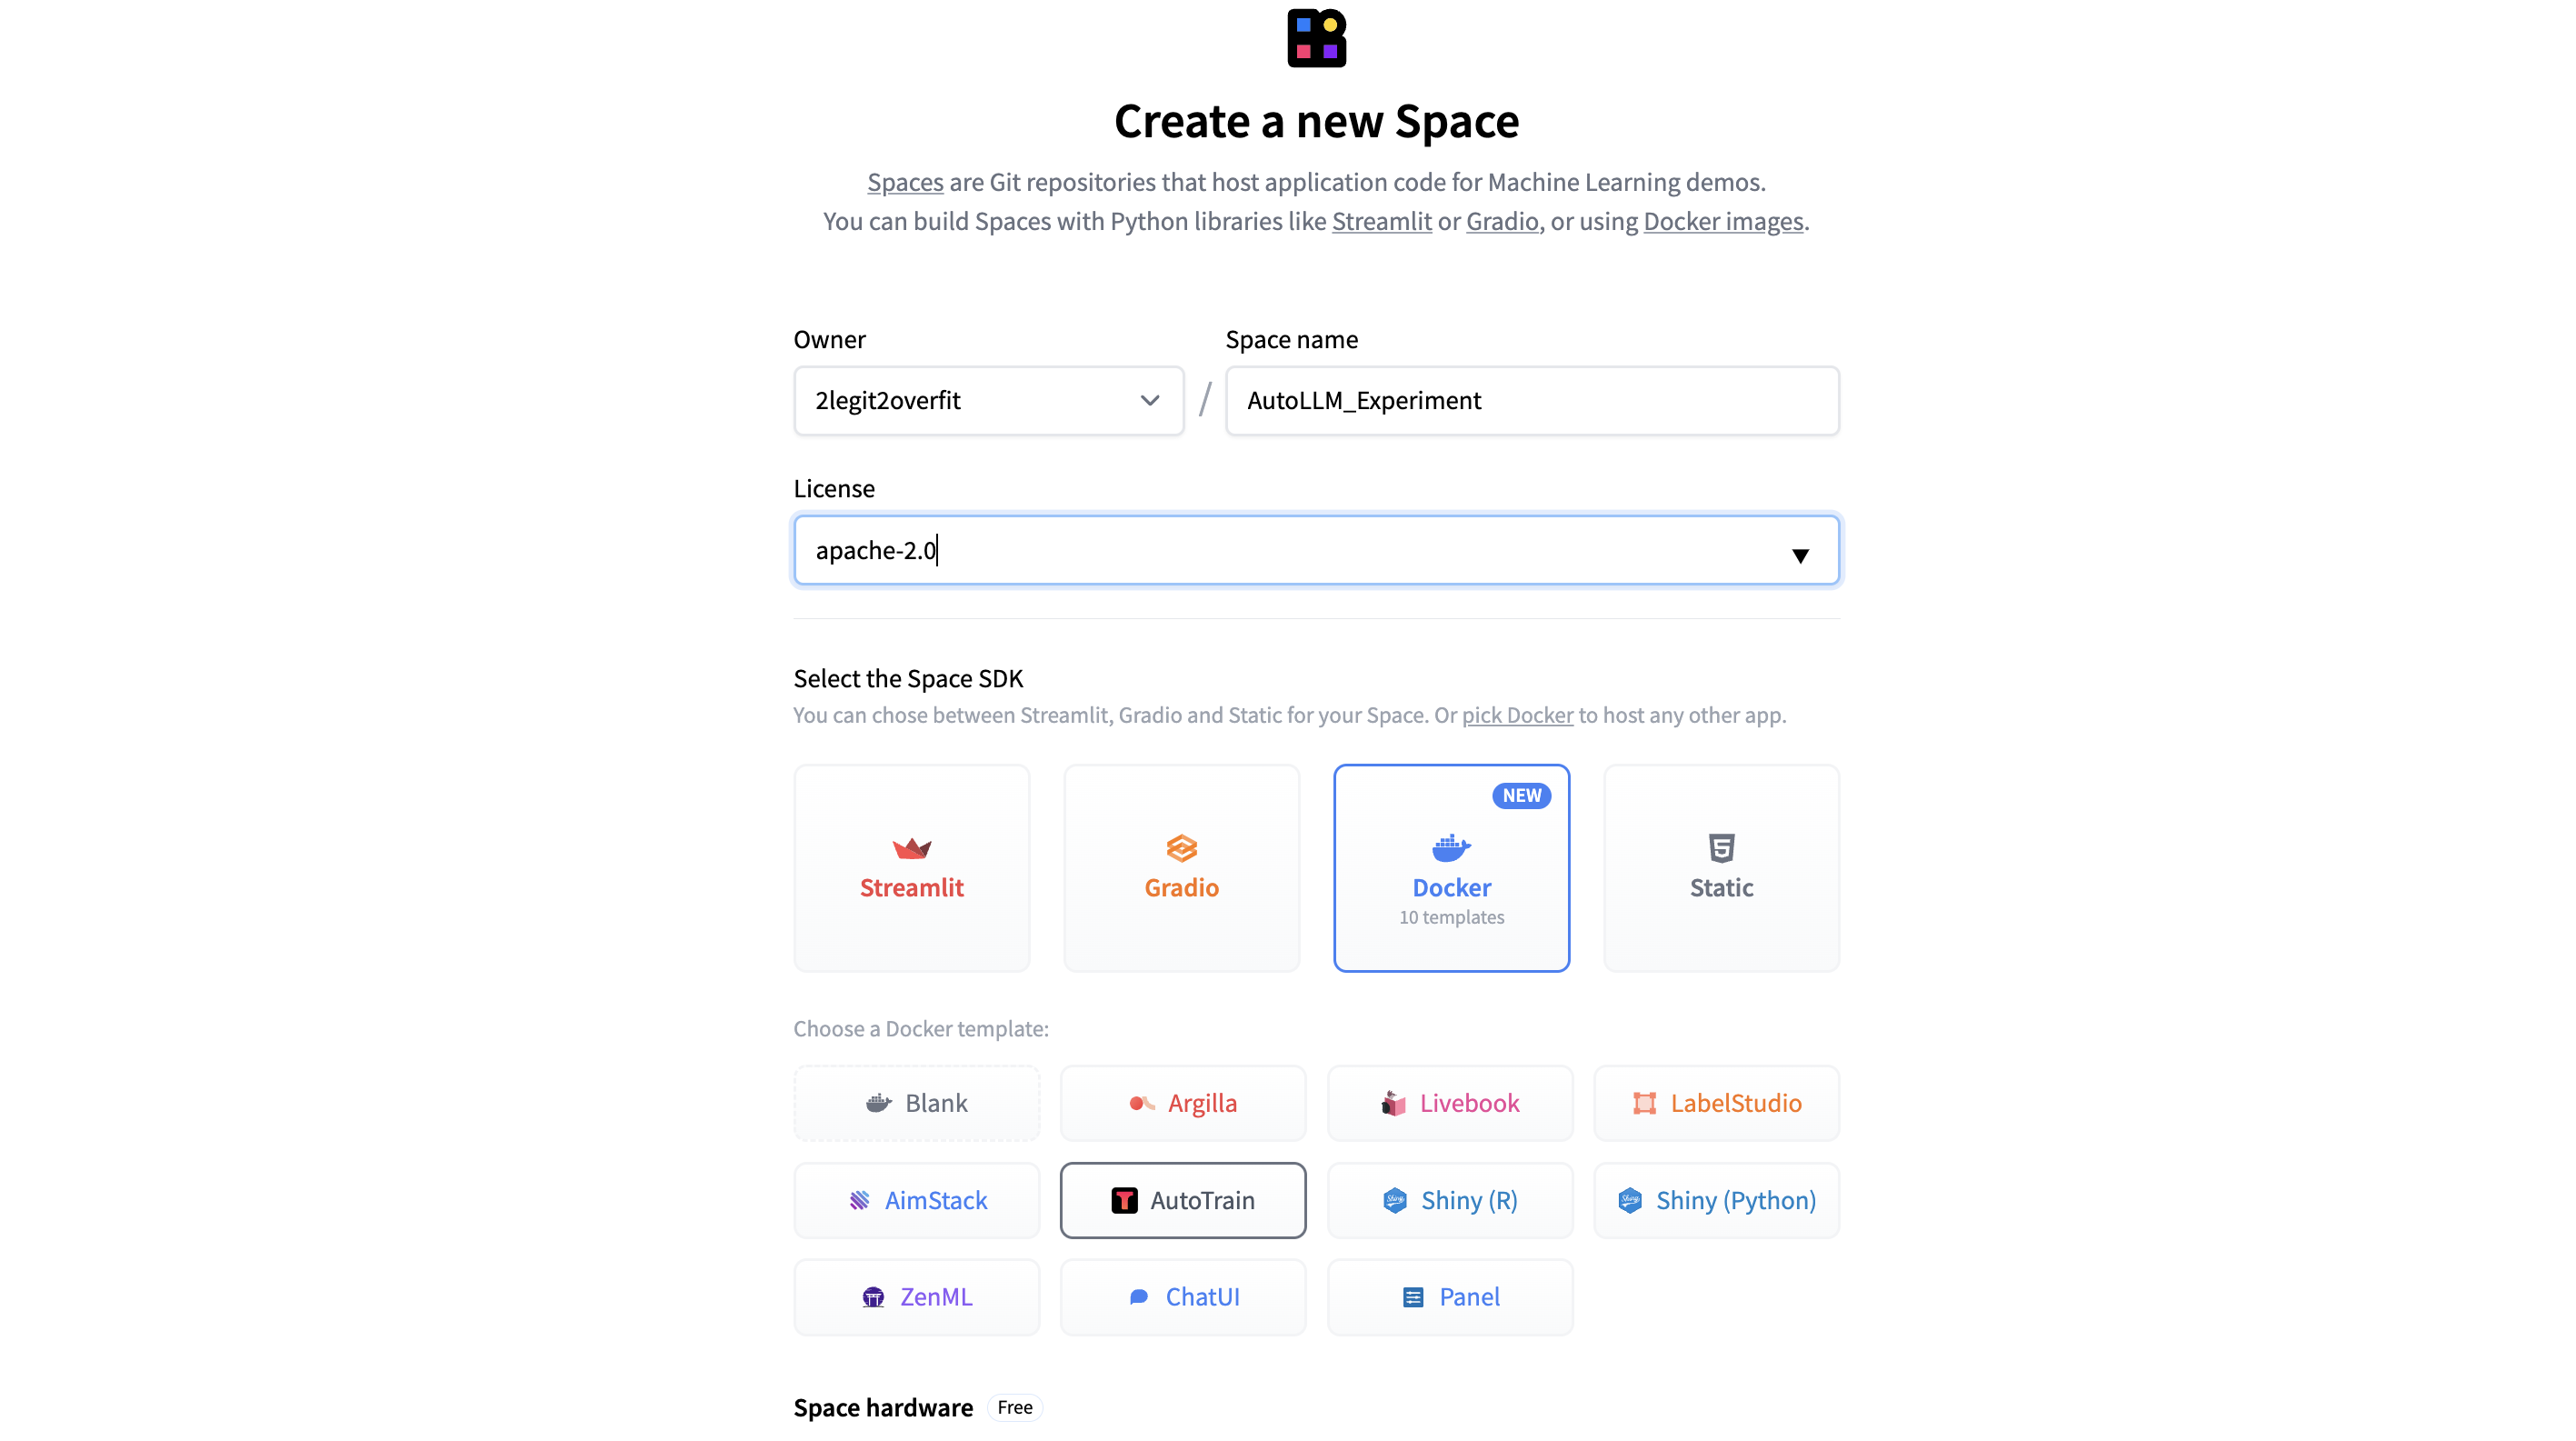
1.4 Select your “Space hardware” for running the app. (Note: For the AutoTrain app the free CPU basic option will suffice, the model training afterward can be done using separate compute which we are able to select later)
1.5 Add your “HF_TOKEN” under “Space secrets” to be able to give this Space access to your Hub account. Without this the Space won’t have the ability to coach or save a brand new model to your account. (Note: Your HF_TOKEN might be present in your Hugging Face Profile under Settings > Access Tokens, be sure the token is chosen as “Write”)
1.6 Select whether you desire to make the “Private” or “Public”, for the AutoTrain Space itself it’s really useful to maintain this Private, but you possibly can at all times publicly share your model or Chat App afterward.
1.7 Hit “Create Space” et voilà! The brand new Space will take a few minutes to construct after which you’ll open the Space and begin using AutoTrain.
Step 2: Launch a Model Training in AutoTrain
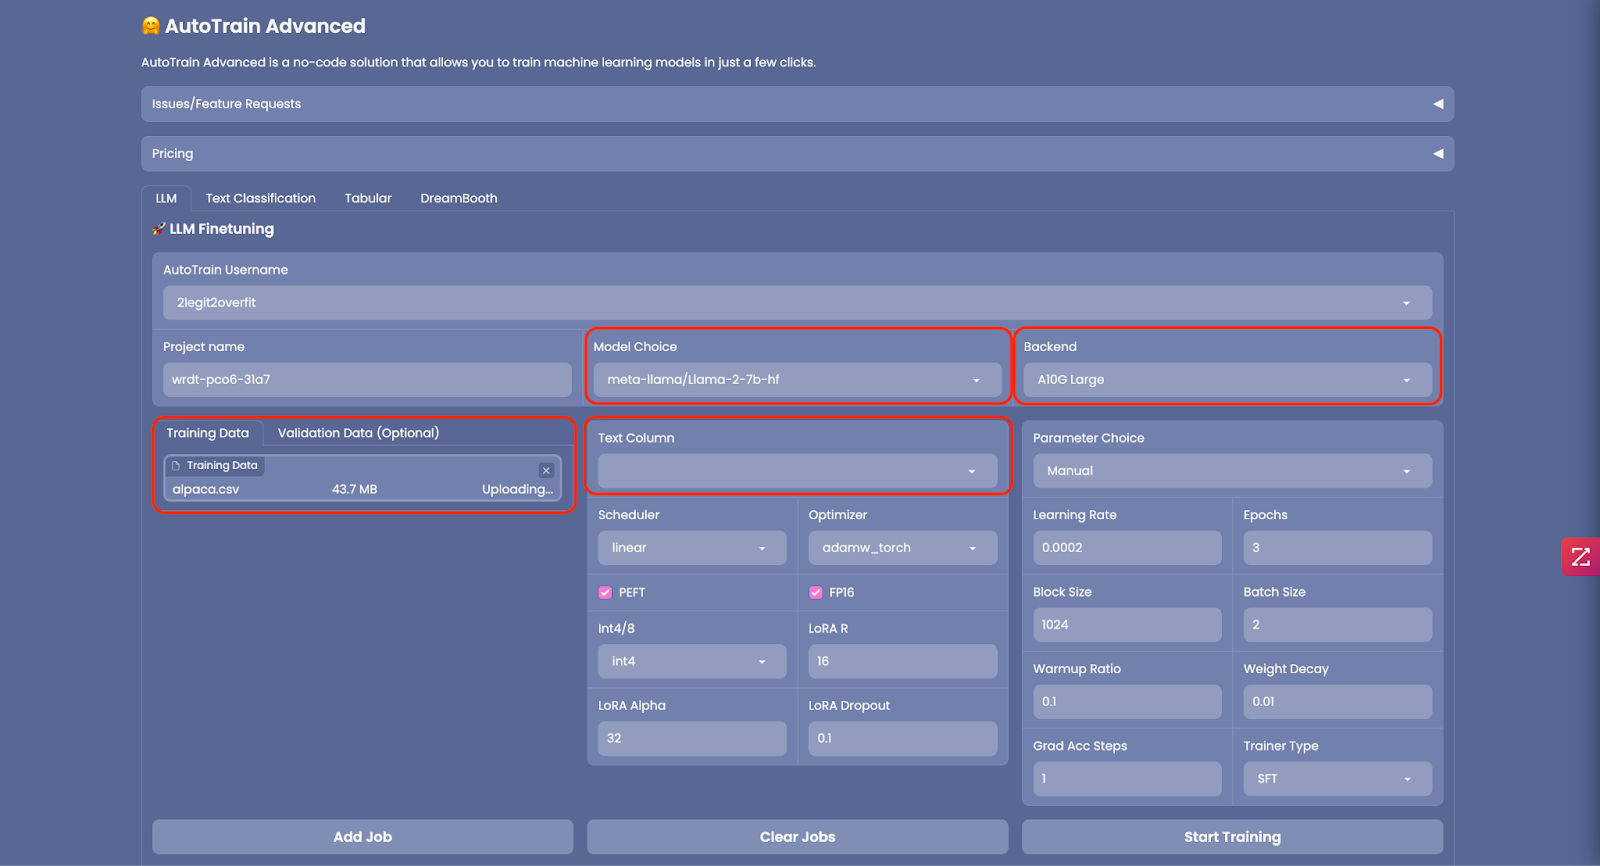
2.1 When you’re AutoTrain space has launched you’ll see the GUI below. AutoTrain might be used for several different kinds of coaching including LLM fine-tuning, text classification, tabular data and diffusion models. As we’re specializing in LLM training today select the “LLM” tab.
2.2 Select the LLM you desire to train from the “Model Selection” field, you possibly can select a model from the list or type the name of the model from the Hugging Face model card, in this instance we’ve used Meta’s Llama 2 7b foundation model, learn more from the model card here. (Note: LLama 2 is gated model which requires you to request access from Meta before using, but there are many others non-gated models you can select like Falcon)
2.3 In “Backend” select the CPU or GPU you desire to use in your training. For a 7b model an “A10G Large” can be sufficiently big. If you happen to decide to train a bigger model you’ll must be sure the model can fully fit within the memory of your chosen GPU. (Note: If you desire to train a bigger model and want access to an A100 GPU please email api-enterprise@huggingface.co)
2.4 After all to fine-tune a model you’ll must upload “Training Data”. While you do, be sure the dataset is accurately formatted and in CSV file format. An example of the required format might be found here. In case your dataset comprises multiple columns, make sure to select the “Text Column” out of your file that comprises the training data. In this instance we’ll be using the Alpaca instruction tuning dataset, more details about this dataset is out there here. It’s also possible to download it directly as CSV from here.
2.5 Optional: You’ll be able to upload “Validation Data” to check your newly trained model against, but this isn’t required.
2.6 Quite a few advanced settings might be configured in AutoTrain to scale back the memory footprint of your model like changing precision (“FP16”), quantization (“Int4/8”) or whether to employ PEFT (Parameter Efficient Tremendous Tuning). It’s really useful to make use of these as is ready by default as it can reduce the time and price to coach your model, and only has a small impact on model performance.
2.7 Similarly you possibly can configure the training parameters in “Parameter Selection” but for now let’s use the default settings.
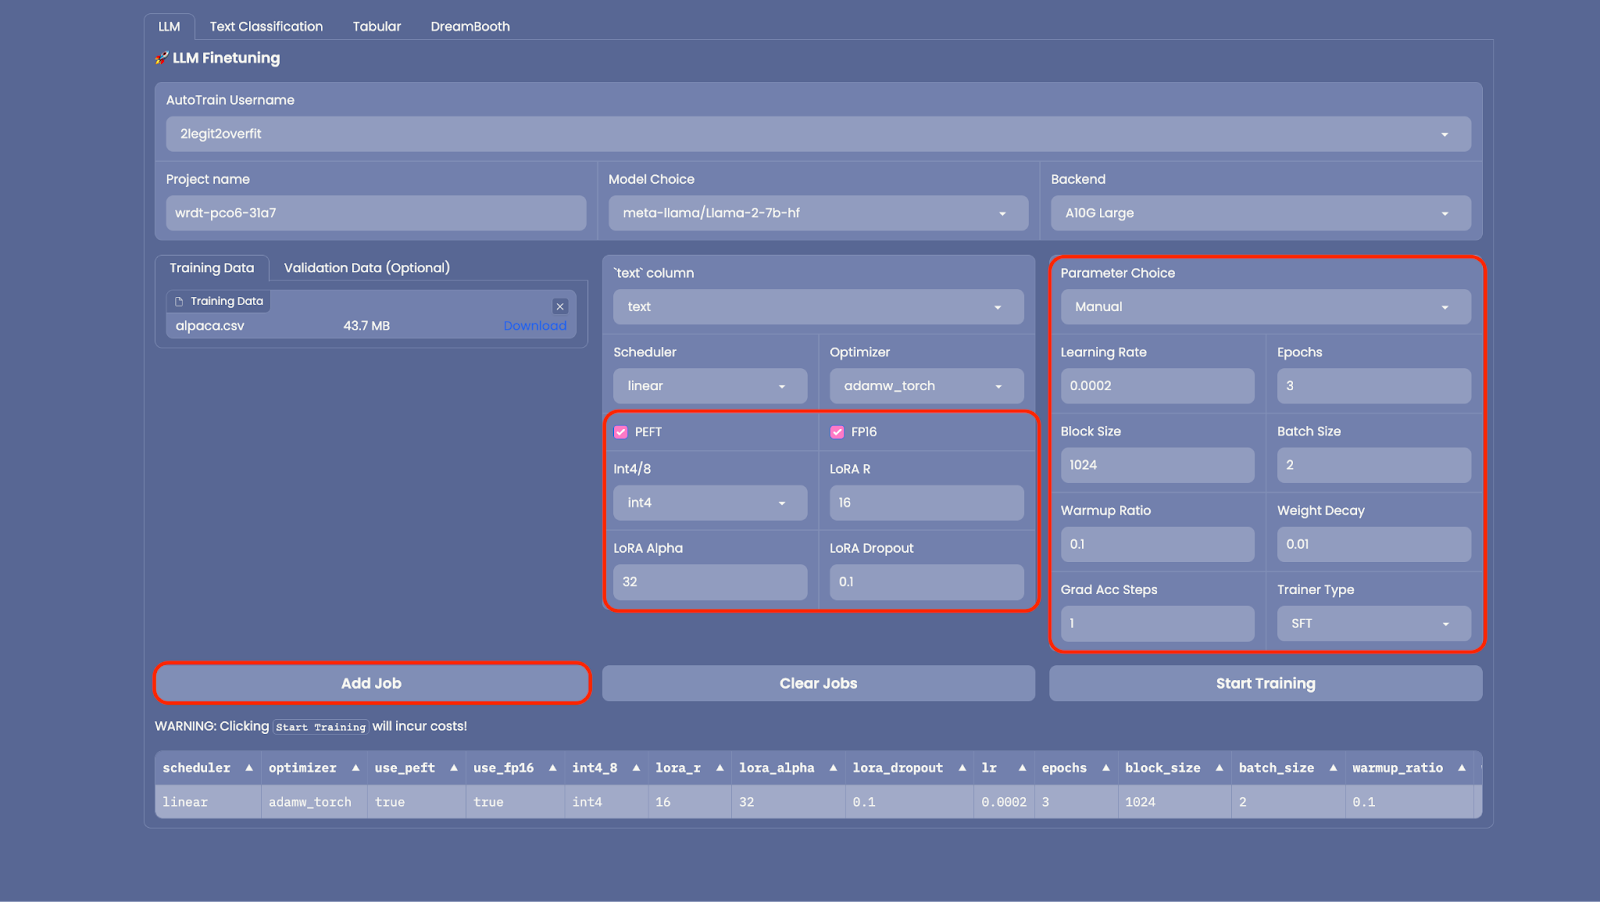
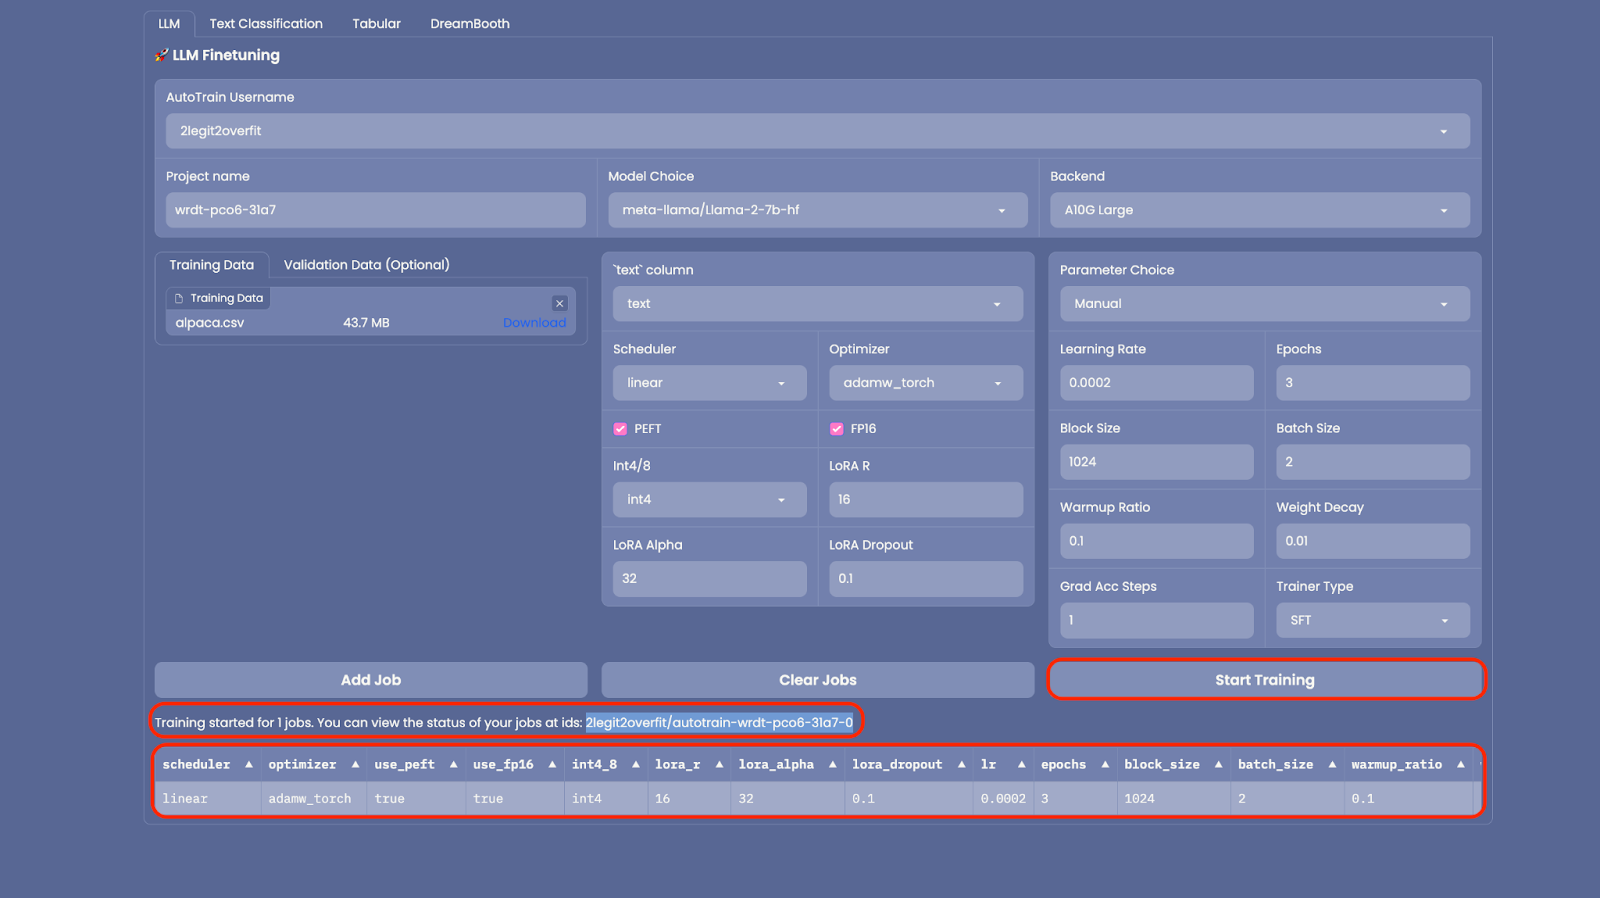
2.8 Now every little thing is ready up, select “Add Job” so as to add the model to your training queue then select “Start Training” (Note: If you desire to train multiple models versions with different hyper-parameters you possibly can add multiple jobs to run concurrently)
2.9 After training has began you’ll see that a brand new “Space” has been created in your Hub account. This Space is running the model training, once it’s complete the brand new model may also be shown in your Hub account under “Models”. (Note: To view training progress you possibly can view live logs within the Space)
2.10 Go grab a coffee, depending on the dimensions of your model and training data this might take just a few hours and even days. Once accomplished a brand new model will appear in your Hugging Face Hub account under “Models”.
Step 3: Create a brand new ChatUI Space using your model
3.1 Follow the identical technique of organising a brand new Space as in steps 1.1 > 1.3, but select the ChatUI docker template as a substitute of AutoTrain.
3.2 Select your “Space Hardware” for our 7b model an A10G Small can be sufficient to run the model, but this can vary depending on the dimensions of your model.
3.3 If you might have your personal Mongo DB you possibly can provide those details to be able to store chat logs under “MONGODB_URL”. Otherwise leave the sector blank and a neighborhood DB can be created routinely.
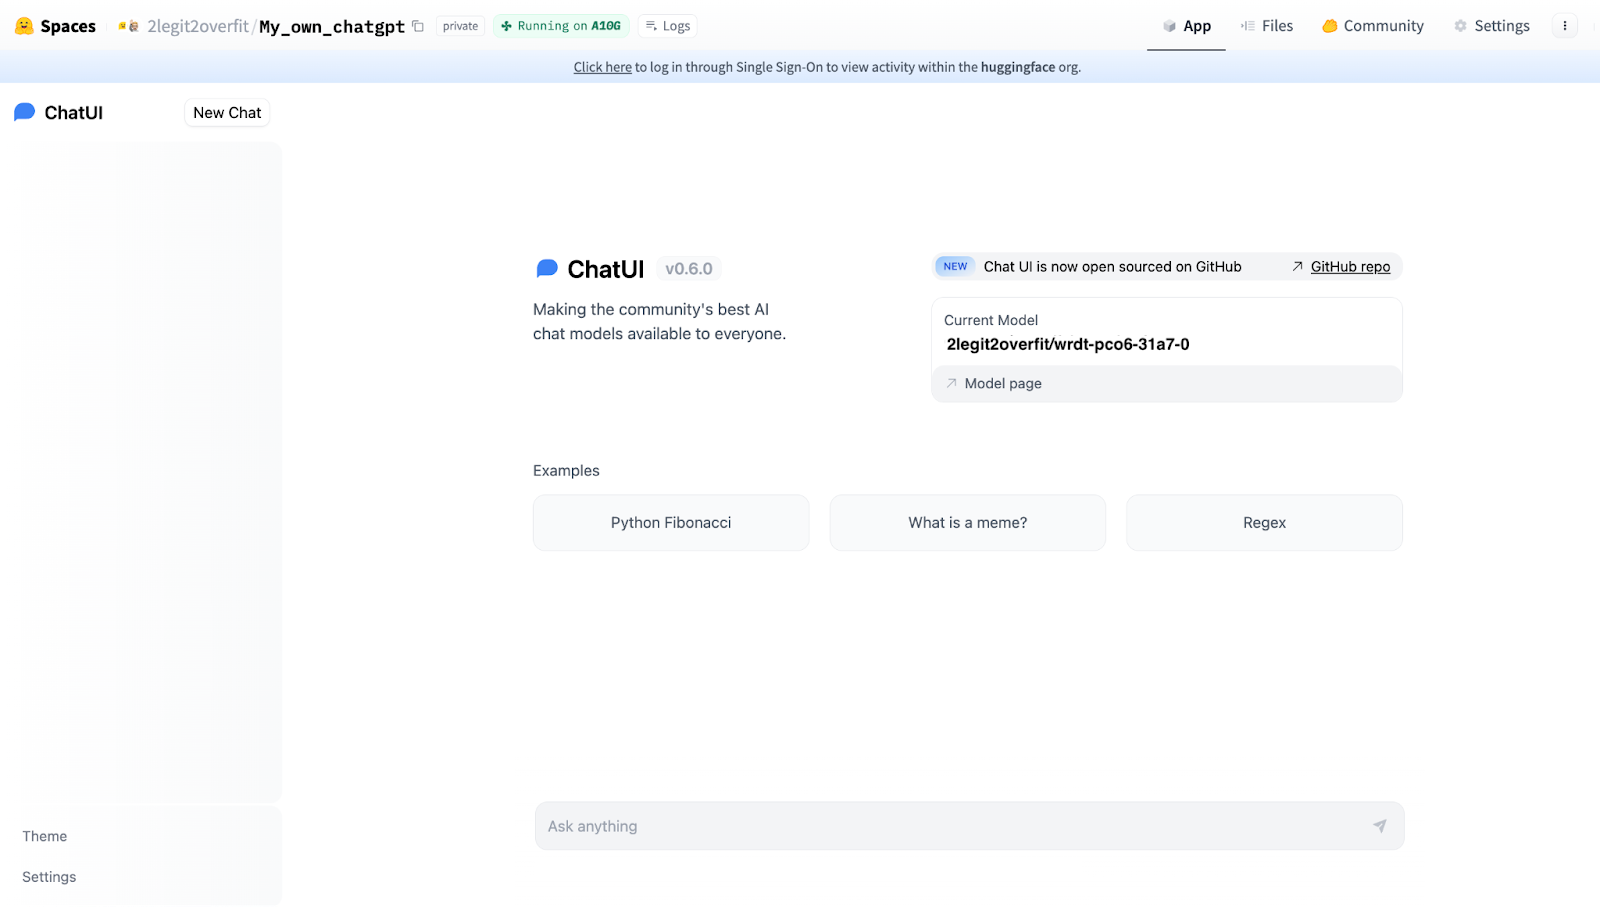
3.4 To be able to run the chat app using the model you’ve trained you’ll need to offer the “MODEL_NAME” under the “Space variables” section. Yow will discover the name of your model by looking within the “Models” section of your Hugging Face profile, it can be the identical because the “Project name” you utilized in AutoTrain. In our example it’s “2legit2overfit/wrdt-pco6-31a7-0”.
3.4 Under “Space variables” you may as well change model inference parameters including temperature, top-p, max tokens generated and others to vary the character of your generations. For now let’s stick to the default settings.

3.5 Now you might be able to hit “Create” and launch your very own open-source ChatGPT. Congratulations! If you happen to’ve done it right it should appear like this.
If you happen to’re feeling inspired, but still need technical support to start, be at liberty to achieve out and apply for support here. Hugging Face offers a paid Expert Advice service that may have the ability to assist.