


For all their amazing performance, state-of-the-art deep learning models often take an extended time to coach. As a way to speed up training jobs, engineering teams depend on distributed training, a divide-and-conquer technique where clustered servers each keep a duplicate of the model, train it on a subset of the training set, and exchange results to converge to a final model.
Graphical Processing Units (GPUs) have long been the de facto selection to coach deep learning models. Nevertheless, the rise of transfer learning is changing the sport. Models are actually rarely trained from scratch on humungous datasets. As an alternative, they’re continuously fine-tuned on specific (and smaller) datasets, with the intention to construct specialized models which might be more accurate than the bottom model for particular tasks. As these training jobs are much shorter, using a CPU-based cluster can prove to be an interesting option that keeps each training time and price under control.
What this post is about
On this post, you’ll learn the way to speed up PyTorch training jobs by distributing them on a cluster of Intel Xeon Scalable CPU servers, powered by the Ice Lake architecture and running performance-optimized software libraries. We’ll construct the cluster from scratch using virtual machines, and you must find a way to simply replicate the demo on your personal infrastructure, either within the cloud or on premise.
Running a text classification job, we are going to fine-tune a BERT model on the MRPC dataset (one in all the tasks included within the GLUE benchmark). The MRPC dataset incorporates 5,800 sentence pairs extracted from news sources, with a label telling us whether the 2 sentences in each pair are semantically equivalent. We picked this dataset for its reasonable training time, and trying other GLUE tasks is only a parameter away.
Once the cluster is up and running, we are going to run a baseline job on a single server. Then, we are going to scale it to 2 servers and 4 servers and measure the speed-up.
Along the best way, we are going to cover the next topics:
- Listing the required infrastructure and software constructing blocks,
- Establishing our cluster,
- Installing dependencies,
- Running a single-node job,
- Running a distributed job.
Let’s get to work!
Using Intel servers
For best performance, we are going to use Intel servers based on the Ice Lake architecture, which supports hardware features equivalent to Intel AVX-512 and Intel Vector Neural Network Instructions (VNNI). These features speed up operations typically present in deep learning training and inference. You’ll be able to learn more about them on this presentation (PDF).
All three major cloud providers offer virtual machines powered by Intel Ice Lake CPUs:
In fact, it’s also possible to use your personal servers. In the event that they are based on the Cascade Lake architecture (Ice Lake’s predecessor), they’re good to go as Cascade Lake also includes AVX-512 and VNNI.
Using Intel performance libraries
To leverage AVX-512 and VNNI in PyTorch, Intel has designed the Intel extension for PyTorch. This software library provides out of the box speedup for training and inference, so we must always definitely install it.
In the case of distributed training, the important performance bottleneck is usually networking. Indeed, the several nodes within the cluster have to periodically exchange model state information to remain in sync. As transformers are large models with billions of parameters (sometimes rather more), the amount of data is important, and things only worsen because the variety of nodes increase. Thus, it is vital to make use of a communication library optimized for deep learning.
In reality, PyTorch includes the torch.distributed package, which supports different communication backends. Here, we’ll use the Intel oneAPI Collective Communications Library (oneCCL), an efficient implementation of communication patterns utilized in deep learning (all-reduce, etc.). You’ll be able to learn in regards to the performance of oneCCL versus other backends on this PyTorch blog post.
Now that we’re clear on constructing blocks, let’s talk in regards to the overall setup of our training cluster.
Establishing our cluster
On this demo, I’m using Amazon EC2 instances running Amazon Linux 2 (c6i.16xlarge, 64 vCPUs, 128GB RAM, 25Gbit/s networking). Setup will probably be different in other environments, but steps must be very similar.
Please have in mind that you have to 4 equivalent instances, so you might need to plan for some kind of automation to avoid running the identical setup 4 times. Here, I’ll arrange one instance manually, create a brand new Amazon Machine Image (AMI) from this instance, and use this AMI to launch three equivalent instances.
From a networking perspective, we are going to need the next setup:
- Open port 22 for
sshaccess on all instances for setup and debugging. - Configure password-less
sshbetween the master instance (the one you may launch training from) and all other instances (master included). - Open all TCP ports on all instances for oneCCL communication contained in the cluster. Please make certain NOT to open these ports to the external world. AWS provides a convenient strategy to do that by only allowing connections from instances running a specific security group. Here’s how my setup looks.

Now, let’s provision the primary instance manually. I first create the instance itself, attach the safety group above, and add 128GB of storage. To optimize costs, I actually have launched it as a spot instance.
Once the instance is up, I connect with it with ssh with the intention to install dependencies.
Installing dependencies
Listed below are the steps we are going to follow:
- Install Intel toolkits,
- Install the Anaconda distribution,
- Create a brand new
condaenvironment, - Install PyTorch and the Intel extension for PyTorch,
- Compile and install oneCCL,
- Install the
transformerslibrary.
It looks like loads, but there’s nothing complicated. Here we go!
Installing Intel toolkits
First, we download and install the Intel OneAPI base toolkit in addition to the AI toolkit. You’ll be able to study them on the Intel website.
wget https://registrationcenter-download.intel.com/akdlm/irc_nas/18236/l_BaseKit_p_2021.4.0.3422_offline.sh
sudo bash l_BaseKit_p_2021.4.0.3422_offline.sh

wget https://registrationcenter-download.intel.com/akdlm/irc_nas/18235/l_AIKit_p_2021.4.0.1460_offline.sh
sudo bash l_AIKit_p_2021.4.0.1460_offline.sh
Installing Anaconda
Then, we download and install the Anaconda distribution.
wget https://repo.anaconda.com/archive/Anaconda3-2021.05-Linux-x86_64.sh
sh Anaconda3-2021.05-Linux-x86_64.sh
Making a latest conda environment
We log off and log in again to refresh paths. Then, we create a brand new conda environment to maintain things neat and tidy.
yes | conda create -n transformer python=3.7.9 -c anaconda
eval "$(conda shell.bash hook)"
conda activate transformer
yes | conda install pip cmake
Installing PyTorch and the Intel extension for PyTorch
Next, we install PyTorch 1.9 and the Intel extension toolkit. Versions must match.
yes | conda install pytorch==1.9.0 cpuonly -c pytorch
pip install torch_ipex==1.9.0 -f https://software.intel.com/ipex-whl-stable
Compiling and installing oneCCL
Then, we install some native dependencies required to compile oneCCL.
sudo yum -y update
sudo yum install -y git cmake3 gcc gcc-c++
Next, we clone the oneCCL repository, construct the library and install it. Again, versions must match.
source /opt/intel/oneapi/mkl/latest/env/vars.sh
git clone https://github.com/intel/torch-ccl.git
cd torch-ccl
git checkout ccl_torch1.9
git submodule sync
git submodule update --init --recursive
python setup.py install
cd ..
Installing the transformers library
Next, we install the transformers library and dependencies required to run GLUE tasks.
pip install transformers datasets
yes | conda install scipy scikit-learn
Finally, we clone a fork of the transformersrepository containing the instance we will run.
git clone https://github.com/kding1/transformers.git
cd transformers
git checkout dist-sigopt
We’re done! Let’s run a single-node job.
Launching a single-node job
To get a baseline, let’s launch a single-node job running the run_glue.py script in transformers/examples/pytorch/text-classification. This could work on any of the instances, and it’s an excellent sanity check before proceeding to distributed training.
python run_glue.py
--model_name_or_path bert-base-cased --task_name mrpc
--do_train --do_eval --max_seq_length 128
--per_device_train_batch_size 32 --learning_rate 2e-5 --num_train_epochs 3
--output_dir /tmp/mrpc/ --overwrite_output_dir True
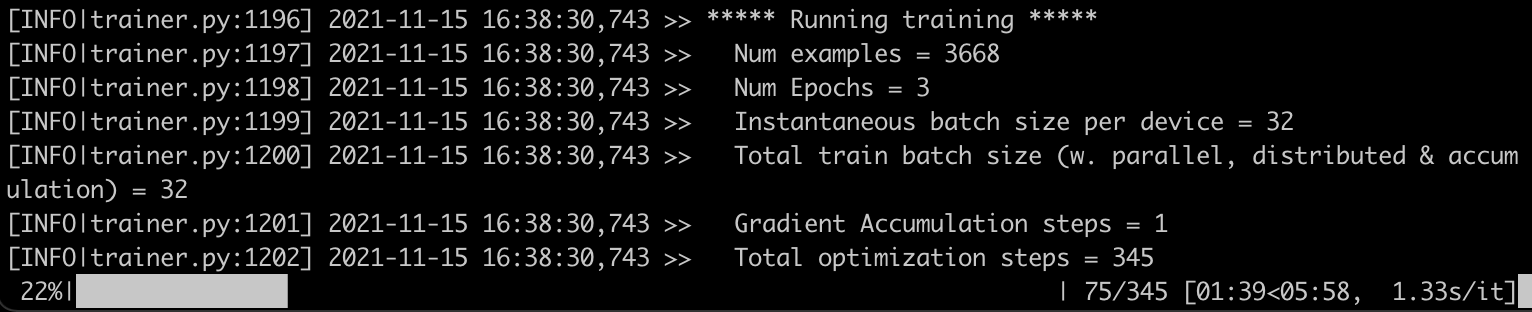
This job takes 7 minutes and 46 seconds. Now, let’s arrange distributed jobs with oneCCL and speed things up!
Establishing a distributed job with oneCCL
Three steps are required to run a distributed training job:
- List the nodes of the training cluster,
- Define environment variables,
- Modify the training script.
Listing the nodes of the training cluster
On the master instance, in transformers/examples/pytorch/text-classification, we create a text file named hostfile. This file stores the names of the nodes within the cluster (IP addresses would work too). The primary line should point to the master instance.
Here’s my file:
ip-172-31-28-17.ec2.internal
ip-172-31-30-87.ec2.internal
ip-172-31-29-11.ec2.internal
ip-172-31-20-77.ec2.internal
Defining environment variables
Next, we’d like to set some environment variables on the master node, most notably its IP address. You could find more information on oneCCL variables within the documentation.
for nic in eth0 eib0 hib0 enp94s0f0; do
  master_addr=$(ifconfig $nic 2>/dev/null | grep netmask | awk '{print $2}'| cut -f2 -d:)
  if [ "$master_addr" ]; then
    break
  fi
done
export MASTER_ADDR=$master_addr

source /home/ec2-user/anaconda3/envs/transformer/lib/python3.7/site-packages/torch_ccl-1.3.0+43f48a1-py3.7-linux-x86_64.egg/torch_ccl/env/setvars.sh

export LD_LIBRARY_PATH=/home/ec2-user/anaconda3/envs/transformer/lib/python3.7/site-packages/torch_ccl-1.3.0+43f48a1-py3.7-linux-x86_64.egg/:$LD_LIBRARY_PATH
export LD_PRELOAD="${CONDA_PREFIX}/lib/libtcmalloc.so:${CONDA_PREFIX}/lib/libiomp5.so"

export CCL_WORKER_COUNT=4
export CCL_WORKER_AFFINITY="0,1,2,3,32,33,34,35"
export CCL_ATL_TRANSPORT=ofi
export ATL_PROGRESS_MODE=0
Modifying the training script
The next changes have already been applied to our training script (run_glue.py) with the intention to enable distributed training. You would wish to use similar changes when using your personal training code.
- Import the
torch_cclpackage. - Receive the address of the master node and the local rank of the node within the cluster.
+import torch_ccl
+
 import datasets
 import numpy as np
 from datasets import load_dataset, load_metric
@@ -47,7 +49,7 @@ from transformers.utils.versions import require_version


 # Will error if the minimal version of Transformers shouldn't be installed. Remove at your personal risks.
-check_min_version("4.13.0.dev0")
+# check_min_version("4.13.0.dev0")

 require_version("datasets>=1.8.0", "To repair: pip install -r examples/pytorch/text-classification/requirements.txt")

@@ -191,6 +193,17 @@ def important():
     # or by passing the --help flag to this script.
     # We now keep distinct sets of args, for a cleaner separation of concerns.

+    # add local rank for cpu-dist
+    sys.argv.append("--local_rank")
+    sys.argv.append(str(os.environ.get("PMI_RANK", -1)))
+
+    # ccl specific environment variables
+    if "ccl" in sys.argv:
+        os.environ["MASTER_ADDR"] = os.environ.get("MASTER_ADDR", "127.0.0.1")
+        os.environ["MASTER_PORT"] = "29500"
+        os.environ["RANK"] = str(os.environ.get("PMI_RANK", -1))
+        os.environ["WORLD_SIZE"] = str(os.environ.get("PMI_SIZE", -1))
+
     parser = HfArgumentParser((ModelArguments, DataTrainingArguments, TrainingArguments))
     if len(sys.argv) == 2 and sys.argv[1].endswith(".json"):
Setup is now complete. Let’s scale our training job to 2 nodes and 4 nodes.
Running a distributed job with oneCCL
On the master node, I take advantage of mpirunto launch a 2-node job: -np (variety of processes) is about to 2 and -ppn (process per node) is about to 1. Hence, the primary two nodes in hostfile will probably be chosen.
mpirun -f hostfile -np 2 -ppn 1 -genv I_MPI_PIN_DOMAIN=[0xfffffff0]
-genv OMP_NUM_THREADS=28 python run_glue.py
--model_name_or_path distilbert-base-uncased --task_name mrpc
--do_train --do_eval --max_seq_length 128 --per_device_train_batch_size 32
--learning_rate 2e-5 --num_train_epochs 3 --output_dir /tmp/mrpc/
--overwrite_output_dir True --xpu_backend ccl --no_cuda True
Inside seconds, a job starts on the primary two nodes. The job completes in 4 minutes and 39 seconds, a 1.7x speedup.

Setting -np to 4 and launching a brand new job, I now see one process running on each node of the cluster.

Training completes in 2 minutes and 36 seconds, a 3x speedup.
One very last thing. Changing --task_name to qqp, I also ran the Quora Query Pairs GLUE task, which relies on a much larger dataset (over 400,000 training samples). The fine-tuning times were:
- Single-node: 11 hours 22 minutes,
- 2 nodes: 6 hours and 38 minutes (1.71x),
- 4 nodes: 3 hours and 51 minutes (2.95x).
It looks just like the speedup is pretty consistent. Be happy to maintain experimenting with different learning rates, batch sizes and oneCCL settings. I’m sure you possibly can go even faster!
Conclusion
On this post, you have learned the way to construct a distributed training cluster based on Intel CPUs and performance libraries, and the way to use this cluster to hurry up fine-tuning jobs. Indeed, transfer learning is putting CPU training back into the sport, and you must definitely consider it when designing and constructing your next deep learning workflows.
Thanks for reading this long post. I hope you found it informative. Feedback and questions are welcome at julsimon@huggingface.co. Until next time, continue learning!
Julien