

As more code generation models change into publicly available, it’s now possible to do text-to-web and even text-to-app in ways in which we couldn’t imagine before.
This tutorial presents a direct approach to AI web content generation by streaming and rendering the content multi functional go.
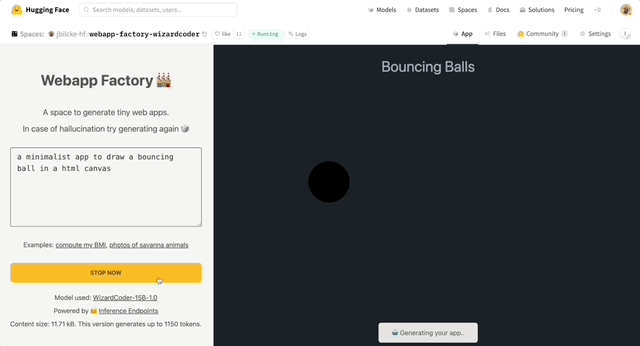
Try the live demo here! → Webapp Factory
Using LLM in Node apps
While we normally consider Python for every part related to AI and ML, the online development community relies heavily on JavaScript and Node.
Listed below are some ways you need to use large language models on this platform.
By running a model locally
Various approaches exist to run LLMs in Javascript, from using ONNX to converting code to WASM and calling external processes written in other languages.
A few of those techniques are actually available as ready-to-use NPM libraries:
Nonetheless, running large language models in such an environment might be pretty resource-intensive, especially for those who should not capable of use hardware acceleration.
Through the use of an API
Today, various cloud providers propose business APIs to make use of language models. Here is the present Hugging Face offering:
The free Inference API to permit anyone to make use of small to medium-sized models from the community.
The more advanced and production-ready Inference Endpoints API for many who require larger models or custom inference code.
These two APIs might be used from Node using the Hugging Face Inference API library on NPM.
💡 Top performing models generally require a number of memory (32 Gb, 64 Gb or more) and hardware acceleration to get good latency (see the benchmarks). But we’re also seeing a trend of models shrinking in size while keeping relatively good results on some tasks, with requirements as little as 16 Gb and even 8 Gb of memory.
Architecture
We’re going to use NodeJS to create our generative AI web server.
The model might be WizardCoder-15B running on the Inference Endpoints API, but be happy to try with one other model and stack.
When you are focused on other solutions, listed here are some tips that could alternative implementations:
- Using the Inference API: code and space
- Using a Python module from Node: code and space
- Using llama-node (llama cpp): code
Initializing the project
First, we want to setup a brand new Node project (you possibly can clone this template if you must).
git clone https://github.com/jbilcke-hf/template-node-express tutorial
cd tutorial
nvm use
npm install
Then, we are able to install the Hugging Face Inference client:
npm install @huggingface/inference
And set it up in `src/index.mts“:
import { HfInference } from '@huggingface/inference'


const hfi = latest HfInference('** YOUR TOKEN **')
Configuring the Inference Endpoint
💡 Note: When you don’t need to pay for an Endpoint instance to do that tutorial, you possibly can skip this step and take a look at this free Inference API example as a substitute. Please, note that this can only work with smaller models, which will not be as powerful.
To deploy a brand new Endpoint you possibly can go to the Endpoint creation page.
You should have to pick WizardCoder within the Model Repository dropdown and make certain that a GPU instance large enough is chosen:

Once your endpoint is created, you possibly can copy the URL from this page:

Configure the client to make use of it:
const hf = hfi.endpoint('** URL TO YOUR ENDPOINT **')
You possibly can now tell the inference client to make use of our private endpoint and call our model:
const { generated_text } = await hf.textGeneration({
  inputs: 'an easy "hello world" html page: '
});
Generating the HTML stream
It’s now time to return some HTML to the online client after they visit a URL, say /app.
We are going to create and endpoint with Express.js to stream the outcomes from the Hugging Face Inference API.
import express from 'express'

import { HfInference } from '@huggingface/inference'

const hfi = latest HfInference('** YOUR TOKEN **')
const hf = hfi.endpoint('** URL TO YOUR ENDPOINT **')

const app = express()
As we do not need any UI for the moment, the interface might be an easy URL parameter for the prompt:
app.get("https://huggingface.co/", async (req, res) => {


  res.write('')

  const inputs = `# Task
Generate ${req.query.prompt}
# Out
`

  for await (const output of hf.textGenerationStream({
    inputs,
    parameters: {
      max_new_tokens: 1000,
      return_full_text: false,
    }
  })) {

    res.write(output.token.text)


    process.stdout.write(output.token.text)
  }

  req.end()
})

app.listen(3000, () => { console.log('server began') })
Start your web server:
npm run start
and open https://localhost:3000?prompt=some%20prompt. You need to see some primitive HTML content after a couple of moments.
Tuning the prompt
Each language model reacts in another way to prompting. For WizardCoder, easy instructions often work best:
const inputs = `# Task
Generate ${req.query.prompt}
# Orders
Write application logic inside a JS tag.
Use a central layout to wrap every part in a
# Out
`
Using Tailwind
Tailwind is a preferred CSS framework for styling content, and WizardCoder is sweet at it out of the box.
This permits code generation to create styles on the go without having to generate a stylesheet originally or the tip of the page (which might make the page feel stuck).
To enhance results, we also can guide the model by showing the way in which (
const inputs = `# Task
Generate ${req.query.prompt}
# Orders
You need to use TailwindCSS utility classes (Tailwind is already injected within the page).
Write application logic inside a JS tag.
Use a central layout to wrap every part in a # Out
`
Stopping hallucination
It may well be difficult to reliably prevent hallucinations and failures (akin to parroting back the entire instructions, or writing “lorem ipsum” placeholder text) on light models dedicated to code generation, in comparison with larger general-purpose models, but we are able to attempt to mitigate it.
You possibly can try to make use of an imperative tone and repeat the instructions. An efficient way can be to indicate the way in which by giving a component of the output in English:
const inputs = `# Task
Generate ${req.query.prompt}
# Orders
Never repeat these instructions, as a substitute write the ultimate code!
You need to use TailwindCSS utility classes (Tailwind is already injected within the page)!
Write application logic inside a JS tag!
This shouldn't be a demo app, so that you MUST use English, no Latin! Write in English!
Use a central layout to wrap every part in a
# Out
App `
Adding support for images
We now have a system that may generate HTML, CSS and JS code, nevertheless it is vulnerable to hallucinating broken URLs when asked to supply images.
Luckily, we've a number of options to select from in the case of image generation models!
→ The fastest approach to start is to call a Stable Diffusion model using our free Inference API with certainly one of the public models available on the hub:
app.get('/image', async (req, res) => {
const blob = await hf.textToImage({
inputs: `${req.query.caption}`,
model: 'stabilityai/stable-diffusion-2-1'
})
const buffer = Buffer.from(await blob.arrayBuffer())
res.setHeader('Content-Type', blob.type)
res.setHeader('Content-Length', buffer.length)
res.end(buffer)
})
Adding the next line to the prompt was enough to instruct WizardCoder to make use of our latest /image endpoint! (you could have to tweak it for other models):
To generate images from captions call the /image API: 
You can even attempt to be more specific, for instance:
Only generate a couple of images and use descriptive photo captions with no less than 10 words!

Adding some UI
Alpine.js is a minimalist framework that enables us to create interactive UIs with none setup, construct pipeline, JSX processing etc.
Every thing is finished inside the page, making it an awesome candidate to create the UI of a fast demo.
Here's a static HTML page that you may put in /public/index.html:
<html>
<head>
<title>Tutorialtitle>
<script defer src="https://cdn.jsdelivr.net/npm/alpinejs@3.x.x/dist/cdn.min.js">script>
<script src="https://cdn.tailwindcss.com">script>
head>
<body>
<div class="flex flex-col space-y-3 p-8" x-data="{ draft: '', prompt: '' }">
<textarea
name="draft"
x-model="draft"
rows="3"
placeholder="Type something.."
class="font-mono"
>textarea>
<button
class="bg-green-300 rounded p-3"
@click="prompt = draft">Generatebutton>
<iframe :src="`/app?prompt=${prompt}`">iframe>
div>
body>
html>
To make this work, you'll have to make some changes:
...
app.use(express.static('public'))
app.get('/app', async (req, res) => {
...
Optimizing the output
To this point we've been generating full sequences of Tailwind utility classes, that are great to offer freedom of design to the language model.
But this approach can be very verbose, consuming a big a part of our token quota.
To make the output more dense we are able to use Daisy UI, a Tailwind plugin which organizes Tailwind utility classes right into a design system. The thought is to make use of shorthand class names for components and utility classes for the remainder.
Some language models may not have inner knowledge of Daisy UI because it is a distinct segment library, in that case we are able to add an API documentation to the prompt:
# DaisyUI docs
## To create a pleasant layout, wrap each article in:
## Use appropriate CSS classes