
Have you ever ever tried making a video, only to get overwhelmed by complicated software? Luckily for you, CapCut offers the proper balance of simplicity and creativity.
CapCut, a tool from the creators behind TikTok, has turned video editing from an intimidating task to an exciting creative process. With its easy-to-use interface and robust features (like AI-powered tools, templates, and dynamic text animations) it’s never been easier to create videos that appear to be they were made by a professional!
On this CapCut review, I’ll discuss the professionals and cons, what it’s, who it is best for, and its key features. Then, I’ll show you easy methods to edit your first video with CapCut using the net version!
I’ll finish the article by comparing CapCut with my top three alternatives (Descript, DaVinci Resolve, and Adobe Premiere Rush). By the top, you will know if CapCut is correct for you!
Verdict
CapCut is a wonderful alternative for beginner and casual video editors. It offers free tools like AI features and cloud storage for seamless editing across devices. Nevertheless, its limitations in advanced manual controls, occasional glitches, and mobile app restrictions may frustrate some people.
Pros and Cons
- Free to make use of with a big selection of features without requiring a subscription for basic functionalities
- Projects are saved in CapCut’s secure cloud storage so you possibly can access and edit your work from any device
- A user-friendly interface for even novice editors to create professional-quality videos easily
- A wide range of tools, including AI features, templates, dynamic text animations
- An in depth library of stock sounds and effects
- Collaborate on projects in real-time
- A scarcity of detailed manual controls for more complex projects
- Glitches with certain features (e.g. background removal and slow processing with larger videos)
- The mobile version doesn’t support landscape mode, which could be restrictive
- Cannot export videos at frame rates faster than 60fps
- Relying heavily on trending effects can result in generic-looking videos that lack originality
What’s CapCut?
CapCut, originally launched by a startup called Shenzhen Lianmeng Technology after which acquired by ByteDance in 2018 (the people behind TikTok), is an AI video editor and graphic design tool for multiple platforms. What began as a mobile app has grown into this cross-platform editing solution that works on just about any device:
- iOS
- Android
- Web browser
- MacOS
- Windows
- iPadOS
As of 2025, CapCut has grown significantly with 500 million monthly lively users. It offers a variety of video editing features, including filters, audio and visual effects, and video templates. The app is especially popular for creating content for social media platforms like TikTok, and it has turn out to be a go-to tool for those seeking to create engaging vertical videos easily.
The people who find themselves using CapCut today should not just the TikTok crowd anymore. Everyone from complete beginners to seasoned content creators are using it.
What makes it particularly awesome for beginners is its intuitive interface. In case you can use your smartphone, you possibly can probably work out CapCut’s basic features in minutes!
The free version of CapCut is surprisingly robust. You get access to tons of effects, transitions, and even AI-powered tools like auto-captions and background removal. The premium version adds some pretty sweet perks like business usage rights, advanced effects, and cloud storage. Nevertheless, I’ve found most casual users can get by just high quality with the free version.
While CapCut is amazingly capable, it is not trying to switch skilled editing software. It’s more about making video editing accessible and efficient for nearly all of content creators who need excellent results without spending weeks learning complex software.
Who’s CapCut Best For?
CapCut is a wonderful tool for individuals who wish to create high-quality videos quickly and simply, especially for social media platforms like TikTok and Instagram. Nevertheless, there are specific forms of individuals who get essentially the most out of it:
- Content creators can use CapCut to create engaging short-form videos with skilled edits.
- Social media influencers can use CapCut to create viral content and enhance their brand with its templates and AI tools.
- Marketers can use CapCut to create impactful promotional videos and advertisements for online campaigns.
- Small business owners can use CapCut to design polished marketing content and connect with their audience on social platforms.
- Entrepreneurs can use CapCut to construct their brand and create visually appealing content for his or her ventures.
CapCut Key Features
Listed here are CapCut’s key features try to be aware of.
AI Editing Tools
CapCut comes with a big selection of AI tools, most notably an AI image generator, AI voice generator, and AI clip maker. Listed here are more AI tools that include CapCut:
- AI script-to-video
- Text-to-Speech
- AI background removal
- AI author for script generation
- AI character generation
- AI audio noise removal
- AI text-to-voice
- AI video upscaler
- AI movement tracking
My favorite must be the auto-caption feature, which is surprisingly accurate about 90% of the time (though it occasionally gives some amusing mix-ups with technical terms). The smart cutaway feature is price using as well. It robotically detects and removes dead space and “ums” out of your footage!
Template Library & Pre-Made Effects
The template library is pretty extensive, with hundreds of options which can be updated weekly. They make for excellent starting points for customizing them to match any style.
The good part is which you could save your personal custom templates. Meaning you possibly can create specific intro sequences and apply them with one click. Plus, the pre-made effects library includes every thing from basic transitions to advanced filters, text animations, and visual effects that may dramatically transform your video’s appear and feel.
Audio Editing Capabilities & Music Library
CapCut’s built-in audio extraction tool separates voice from background noise to avoid wasting recordings that might’ve otherwise been ruined by ambient sounds. This is especially useful for podcasts and voiceovers.
It also comes with advanced audio editing tools like the flexibility to remove background noise, adjust pitch and speed, and apply audio effects. You may also record audio directly inside the app.
The music library is huge, with tracks sorted by mood, tempo, and genre. This organization helps me find suitable music for projects quickly. Plus, the music can robotically adjust its length to match your video. No more awkward music cuts!
Text Effects & Animation Options
CapCut also comes with text effects and animations. There are over 300 text animation presets and every one could be customized. The platform also allows for various forms of text animations, including in-and-out motions to reinforce your videos.
My personal favorite is the tracking text feature that follows moving objects. It’s perfect for highlighting specific parts in how-to guides or tutorials.
For more control, you possibly can manually keyframe text animations for more control over how text appears and moves throughout the video. This enables for precise adjustments to the timing and positioning of text elements.
Export Quality & Supported Formats
With CapCut, you possibly can export in resolutions as much as 4K at 60fps. The supported formats include MP4, MOV, and even GIF.
Listed here are some specific numbers which may assist you to out:
- Maximum video resolution: 4K (3840 x 2160)
- Frame rate options: 24, 30, 60fps
- Aspect ratio presets: 16:9, 9:16, 1:1, 4:5, and custom
- Audio sample rate: As much as 48kHz
- Maximum project length: 180 minutes
How you can Use CapCut
Here’s easy methods to create videos with CapCut:
- Create a CapCut Account
- Select an Aspect Ratio
- Import Media
- Trim the Clip
- Split the Clip
- Add Transitions
- Add Music
- Record a Voiceover
- Add Text
- Edit the Text
- Add Effects & Filters
Step 1: Create a CapCut Account

I began by going to capcut.com and choosing “Try CapCut online.”

After creating an account, I used to be taken to the editor!
Step 2: Select an Aspect Ratio
The very first thing I did was select my aspect ratio. There are a selection to pick from for all major social media platforms:
- 16:9 (YouTube)
- 4:3 (LinkedIn and Facebook)
- 2:1
- 9:16 (TikTok)
- 1:1 (Instagram)
- 3:4
I went with the TikTok ratio (9:16), but select whatever aspect ratio makes essentially the most sense on your project!
Step 3: Import Media

Next, I imported some media. You may click the massive “+” button in the center or drag and drop files to upload them.
You may easily drag and drop multiple clips on the timeline in the specified order should you’ve uploaded multiple clips. In case you’re importing a number of clips directly, it is often a superb idea to arrange your files before importing them.
Step 4: Trim the Clip

If you should trim the clip you only imported, all you could have to do is select the clip you should trim and drag the handles at either end to regulate length.
Step 5: Split the Clip

To separate a clip, position the play head and click on the “Split” button (Ctrl + B)
Step 6: Add Transitions

So as to add transitions between clips, click the transition icon between two clips within the timeline.

This may open your transition styles within the panel on the left where you possibly can pick from various lighting effects, blurs, glitch effects, and more.
Once the transition has been added, you possibly can increase or decrease the duration of it by clicking and dragging the handles at either end to regulate the length. For the most effective results, I often follow the default length!
Step 7: Add Music

To import music to your video with CapCut, all you could have to do is select the “Audio” tab. You’ll find what you are searching for by trying to find specific music within the search bar and searching through the various categories.

Once you’ve got found a song you are keen on, hover over the song and press the play button to preview it. Determine whether you want to bookmark it and reserve it for later, or add it to your timeline by hitting the “+” icon.

To regulate volume levels, click on the audio file within the timeline. This may open a small window where you possibly can adjust the amount, add a fade in/out, reduce the noise, and more.
Step 8: Record a Voiceover

To record voiceovers, click the microphone icon and permit permissions.
Step 9: Add Text

So as to add text to your video, click the “Text” button on the left. Select the text style and sort your content.
Step 10: Edit the Text
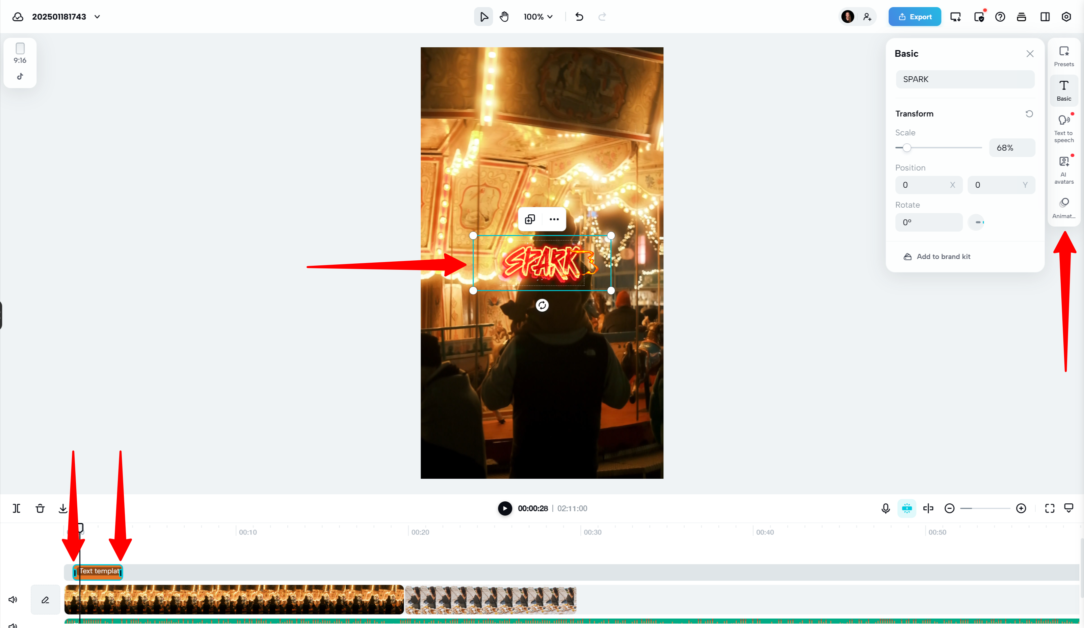
- To regulate the duration of the text, click and drag the handles at either end within the timeline.
- To alter the scale and position of the text, click and drag it to your required position and click on and drag the corners of it to make it greater or smaller.
- To alter the animation style, hit “Animation.”

Something that I really like about CapCut is you possibly can add animations at the start and end of the text.
To do that, just hit select the text, hit the “Animation” button, and choose the animation you wish at the start and end by hitting “In” and “Out.”
Step 11: Add Effects & Filters

So as to add effects and filters to your video in CapCut, select “Effects” (or “Filters”) and choose what you should add to your timeline. Click and drag the handles at either end within the timeline to set the duration.
For templates, select “Templates” from the menu on the left. Browse categories or seek for specific types, preview the templates before choosing, and customize colours, text, and timing to match your brand.
To export your video, hit the “Export” button on the highest right, select your resolution (1080p is standard for many platforms), select your frame rate (30fps is typical), and pick your format (MP4 is most compatible).
Top 3 CapCut Alternatives
Descript
The primary CapCut alternative I’d recommend is Descript. What I really like most about Descript is the way it makes video editing as easy as writing a document. This enables me to concentrate on storytelling as an alternative of mastering complex tools!
CapCut and Descript are powerful video editing tools. Nevertheless, CapCut features AI tools, templates, and team collaboration for creative projects on the go. However, Descript offers a text-based editing approach and AI transcription, making it a superb tool for creating podcasts and YouTube videos.
A key similarity between these two platforms is their AI features. Each platforms are great at automating tasks, like background removal and text-to-speech in CapCut or filler word removal and transcription in Descript. Nevertheless, Descript leans more into audio refinement and collaborative workflows, while CapCut is healthier for visually dynamic and social media-focused edits.
In case you’re searching for a free, mobile-friendly editor to create stunning social media videos, select CapCut. For a text-driven editor with AI features for polished skilled projects, select Descript!
DaVinci Resolve
The subsequent CapCut alternative I’d recommend is DaVinci Resolve. What I really like most about DaVinci Resolve is that it offers the creative freedom to take my videos from basic edits to cinematic masterpieces in a single cohesive platform!
While CapCut is a wonderful user-friendly, AI editor for quickly creating content (especially for social media), DaVinci Resolve offers a professional-grade toolkit that rivals industry-standard software in Hollywood. Despite their differences, each platforms share key features like AI-powered tools and the flexibility to handle video editing but cater to vastly different levels of experience and project demands.
CapCut stands out with its intuitive interface, mobile-friendly design, and smart tools like background removal, text-to-speech, and video upscaling. It’s perfect for beginners and creators focused on fast, social-ready content.
In contrast, DaVinci Resolve offers a sophisticated, all-in-one post-production suite. It includes specialized “pages” for editing, color correction, audio post-production, and visual effects, making it ideal for large-scale projects. Unlike CapCut, DaVinci Resolve supports high-end workflows like 32-bit float processing and HDR color grading for unparalleled quality.
For a fast, easy editor with AI tools to streamline content creation, select CapCut. For more control to create high-quality, skilled projects, DaVinci Resolve is the clear winner!
Adobe Premiere Rush
The ultimate CapCut alternative I’d recommend is Adobe Premiere Rush. What I really like about Adobe Premiere Rush is the way it strikes an ideal balance between simplicity and artistic control for creating professional-quality videos quickly.
Each CapCut and Adobe Premiere Rush simplify video editing and cater to creators of all skill levels. They each offer mobile and desktop compatibility for editing on the go.
Additionally they support social media-oriented features like aspect ratio adjustments and built-in templates for quick edits. Nevertheless, their approaches and goal users are different.
CapCut emphasizes accessibility and creativity with powerful AI tools like background removal and AI color correction. It’s especially suited to those creating content for platforms like TikTok, with features like script-to-video and customizable templates. It’s full of features and optimized for quick, skilled results with out a steep learning curve.
However, Adobe Premiere Rush is a component of Adobe’s broader Creative Cloud ecosystem. It offers more flexibility for intricate edits, allowing you to tweak color grading, speed, and audio. It also comes with premium assets like skilled transitions, animated titles, and audio ducking features.
For a user-friendly app with cutting-edge AI tools to create social media edits, select CapCut. Nevertheless, if you should dive deeper into skilled editing while keeping things easy and intuitive, Adobe Premiere Rush is your best bet!
CapCut Review: The Right Tool For You?
CapCut has proven itself as a superb tool for creating quick, creative video projects. Its user-friendly interface, AI tools, and free features make it the proper tool for creating engaging social media content and quick edits no matter your video editing skills.
While it stands out for its accessibility and ease of use, it falls short for more advanced, detail-oriented projects. In case your focus is on creating engaging videos without diving into the complexities of skilled software, CapCut is a wonderful alternative!
Nevertheless, should you’re keen on exploring the most effective CapCut alternatives, here’s what I’d suggest:
- Descript is best for podcasters, YouTubers, and content creators who prioritize audio and transcription editing. Its text-based editing and collaboration tools make it an excellent alternative for projects involving narration or team workflows.
- DaVinci Resolve is best for skilled video editors and filmmakers searching for precise control over editing, color grading, and visual effects. It is best for cinematic projects requiring advanced tools.
- Adobe Premiere Rush is best for small business owners, social media marketers, and entrepreneurs who desire a balance of simplicity and artistic control. It’s a user-friendly option with premium Adobe features.
Thanks for reading my CapCut review! I hope you found it helpful. CapCut’s free version has lots to supply, so why not try it for yourself and see the way you prefer it?
Regularly Asked Questions
Is CapCut protected to make use of?
CapCut could be protected to make use of should you take proper precautions (e.g. limiting app permissions, avoiding sensitive content, and being vigilant about potential risks). Nevertheless, the app lacks robust parental controls and has potential safety concerns (particularly for youngsters) including exposure to inappropriate content and indirect social interactions through linked platforms like TikTok.
What are the negatives of CapCut?
CapCut has several limitations like glitches with certain features and being restricted to portrait mode on mobile. The platform also cannot export videos beyond 60fps.
Is CapCut good or not?
CapCut is a robust, free video editing platform that provides a wide range of features like dynamic text animations, AI tools, and an in depth library of effects. This makes it a superb tool for social media content creators and beginners. Nevertheless, it has limitations corresponding to being primarily mobile-focused, having potential privacy concerns, and offering less advanced manual controls which may frustrate skilled video editors searching for more comprehensive editing capabilities.
Is CapCut actually free?
CapCut is definitely free, offering a comprehensive video editing platform with features like AI tools, templates, effects, and cloud storage for free of charge. Nevertheless, while the essential version stays free, CapCut has been steadily moving some previously free features to their Pro version.